Friday, February 27, 2009

2/27_Keyboard Worksheet & Catch Up Day


Basic and Advanced

So everyone's been doing a great job and working really hard for the last two weeks. It seems like most of you folks are really getting the hang of making beats. However, I just checked the Dropoff folder yesterday and most people have at least a couple of assignments that they haven't turned in yet.

Today I'm going to have you fill out a short
worksheet where you just write in the names of the notes of the keyboard, then you have the rest of the period to finish up and turn in any work that I don't yet have from you. Your order of priorities should be:
  1. Fill out the Keyboard Worksheet and have one of the instructors take a look.
  2. Finish and turn in all missing work.
  3. Advanced class, you all still have the newest Chord Progression assignment to work on. If you're having trouble, today is a good day to have an instructor help you.
  4. Basic class, if you're done with everything else, please work on your own original beat. Try to work with one of the instruments we haven't worked with yet (NNXT, Malstrom, Dr. Rex, Combinator). Tons of cool sounds you have yet to discover!
Have a Great Weekend!!!

Thursday, February 26, 2009

2/26_Black Keys/Chord Progressions 1


Basic

Yesterday we took some time to learn about the white keys of the keyboard.


How many different notes are there?

Which ones have we learned so far?

So, today, we're going to talk a little bit about the remaining notes - the ones on the black keys.

The black keys don't have their own letters like the white keys do (ABCDEFG). Instead, the black keys are named by where they are in relation to the white keys.

A black key that is to the right of a white key is called a sharp.


A black key that is to the left of a white key is called a flat.

Here are the symbols of sharps and flats:
Here is what they look like on an actual keyboard:
What do you notice about each of the black keys?

OK, here is the important thing about black keys:

Black keys each have two names because they are always to the right of one white key and to the left of another.

Confused? It's actually not so tricky. Think about it...

There is black key in between F and G. If you're going up from F, then it is called F sharp. If you're going down from G, then it is called G flat.

OK, so today you're going to do 2 things:

  • Get a keyboard worksheet from Mr. Runde and fill it out.
  • Do the assignment below
Assignment
  1. Open Reason and create a new file.
  2. Create a Redrum and load some sounds into it.
  3. Make a 32-step drum beat and put it into your Sequencer Window for  8 bars (Bar 1 - Bar 9)
  4. Now, using either Pattern 2 or a second Redrum, make a 2nd drum beat (16-step is fine) and put it into your Sequencer for another 8 bars (Bar 9 - Bar 17).
  5. Now Create a Subtractor Analog Synthesizer
  6. Load a sound into it that you like (no FX or Percussion please).
  7. Set your loop markers to the first part of your beat (L marker on Bar 1, R marker on Bar 9) and let your beat play. 
  8. Using the black keys on your keyboard, come up with a melody on the Subtractor. When you've got it down, record it.
  9. Now move your markers so that the L is on Bar 9, R is on Bar 17.
  10. Create a 2nd Subtractor and load a different sound into it.
  11. Again, using the black keys, come up with a second melody and record it.
  12. When you're done, move the L marker back to Bar 1 and play the whole thing back from the start. Does the transition sound cool? 
  13. Save this as your name_black keys and put a copy in the Dropoff folder.
 
Advanced
  • Fill out the keyboard worksheet from Mr. Runde
  • Find the 1st, 4th and 5th notes of the scale.
  • Ask Corina or Mr. Runde to show you how to make chords with each of these notes.
  • Make a 16 bar beat using this chord progression. 

Tuesday, February 24, 2009

2/24_Keyboard Basics/Finish C-Minor Chord


Basic

There are two goals for today:
1) Learn the keys of the keyboard
2) Continue working with the NN19 Digital Sampler and use it to play the C Major scale.

Keys of the Keyboard

OK, here's one thing you need to understand: there are only 12 notes that you can play!

Here is what they look like:


Now, you may be thinking, "But I've seen a piano before and I know they've got a lot more than 12 of those things on them". Take a look at this picture of a full sized piano keyboard:
Notice any patterns?

So, basically this whole keyboard is made up of sets of these 12 notes repeating. A set of 12 notes is called an octave. As you go to the right, the pitch gets higher, as you go to the left, the pitch gets lower, but there are always just the same 12 notes.

"What are the names of these notes, Mr. Runde?" you ask.

Good question. Today, let's just focus on the white keys:
  • The white keys are just the first 7 letters of the alphabet (A-B-C-D-E-F-G) repeating over and over.

What is the name of the first note on the left? What happens when you go 12 notes to the right? What do you think the next white note to the right will be?

So, if you play each of these white keys in order, from C to C, you will be playing what is called the C Major scale. We will be working on this more on Thursday, but for now, just REMEMBER...

The white keys are just the first 7 letters of the alphabet (A-B-C-D-E-F-G).

The NN19

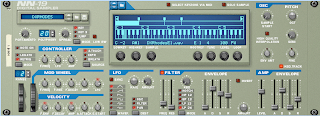
The NN19 is a type of instrument called a sampler. Like we discovered yesterday, it lets you load the sounds of all kinds of instruments and play them with your keyboard. Today I want you to do the following:
  1. Start a new Reason file.
  2. Create an NN19 Digital Sampler.
  3. Now load a patch into your NN19 (piano, guitar, etc.)
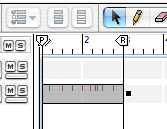
  4. Set the L marker to Bar 1, and the R marker on Bar 5.
  5. Now turn on the Click and hit the SPACEBAR to start playback.
  6. Adjust the tempo to whatever you're comfortable with.
  7. While listening to the click, practice playing the C Major scale (all the white notes, one at a time). Be sure to go up and down the scale. Try to play each note on the the clicks. Play the highest note (C) twice.
  8. With the Redrum, create a 32-step drum beat and put it into your Sequencer Window for 4 Bars.  (use Copy Pattern to Track).
  9. Save this as your name_C Major and turn in a copy to the Dropoff folder.

Advanced
So, all my advanced people need to finish up and turn in their C-Minor Chord assignments. To get full credit, your song must include all of the following:
  • A drum beat 8-16 bars long.
  • A melodic instrument that you use to play the C-Minor Chord.
  • A melodic instrument that you use to play an original melody that goes with the C-Minor Chord. 

Monday, February 23, 2009

2/23_Introducing the NN19/C-Minor chords


Basic

Today you're going to start working with a new instrument, the NN19.

Assignment:
  1. Start a new Reason session.
  2. Create a Redrum drum machine and make a 32-step drum beat.
  3. Set your loop markers (L on Bar 1, R on Bar 5) and put your drums into the Sequencer Window using Copy Pattern to Track.
  4. Now Create an NN19 Digital Sampler.
  5. Load a patch into it and start to play some notes along with your drum beat.
  6. When you feel like you have a good melody going, go ahead and record yourself playing.
  7. If you don't like your performance, hit Undo (Apple-Z) and record it again. If you're happy with it, go on to the next step.
  8. Using the Pencil tool, draw a region around the notes you just recorded (click and drag from Bar 1 to Bar 5).
  9. Go back to the Arrow tool and use it to copy both the drums and the melody so that they end on Bar 17.
  10. Save your beat to your Home folder as your name_NN19.
  11. Put a copy in the Dropoff folder (Pickupdropoff>BAVAC>Dropoff>Period 5).
Advanced
Please finish working on your C-Minor Chord assignment. This will be due by the end of tomorrow.


Thursday, February 19, 2009

2/20_Copying and Pasting/C-Minor chord


Basic

By the end of this class, you need to have turned in 3 Reason files from the assignments this week:
  1. your name_2 Patterns
  2. your name_32 Step
  3. your name_Calabria (today's assignment)
Please make sure that these are turned in to the Dropoff folder before you leave today. If you're not sure how to do this, just ask!

Today we're going to
start to build our songs by copying and pasting regions in the Sequencer Window.

First of all, what are
regions?

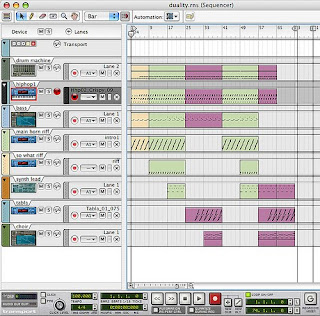
Regions are the building blocks you use to put together a song in Reason. They look like colored blocks in the Sequencer Window. Like this...

We have been creating regions everytime we did Copy Pattern to Track with the Redrum.

The cool thing is, once you've got a region in the Sequencer Window, you can copy it as many times as you want to quickly stretch your beat out into a whole song.

To copy just do this:
  1. Hold down the OPTION key on your keyboard.
  2. Click and drag the region you want to copy it wherever you want to put it.
OK, so your assignment today is as follows:

1. Copy the file called "Calabria.rns" to your Home folder. You can get it from either the Pickup folder (Pickupdropoff>BAVAC>Pickup>Period 5) or from Mr. Runde's Jump drive.
2. Open the file and hit SPACEBAR to listen to the melody.
3. Create a Redrum drum machine and make a 2-bar (32 step beat) to go along with the melody.
4. Put the pattern into the Sequencer window using Copy Pattern to Track. Make sure the L is on Bar 1 and the R is on Bar 3).
5. Now Copy and Paste the drums and the saxophone regions so that they both end on Bar 9.
6. Turn off Enable Pattern Section in the Redrum.

7. Play back the whole beat and listen to it.
8. If you are happy with it, then go to File>Save As and save the file to your Home folder. Be sure to change the filename to: your name_Calabria.
9. Put a copy of the file in the Dropoff folder (Pickupdropoff>BAVAC>Dropoff>Period 5).

At this point, you should make sure you've turned in all 3 beats. If you're not sure, just go ahead and turn them in again.

If you've turned everything in, let one of the instructors know and they'll tell you what to do next....


Advanced

Advanced folks should be finished with the G Major chord (be sure to turn it in to the Dropoff folder!!!) and be starting on C-Minor chord assignment.

Same deal as with G-Major:
  1. Get your keyboard worksheet from Mr. Runde or Corina.
  2. Label all the notes of the C-Minor scale.
  3. Open Reason and lay down an 8-16 bar drum beat from either the Redrum or Dr. Rex.
  4. In Reason, create a melodic instrument (Subtractor/Malstrom/NN19/NNXT). Make sure that it is one where you can play more than one note at a time - not a Bass or Mono Synth patch.
  5. Looking at your worksheet, find the 1st/3rd/5th notes of the C-Minor scale, then find those notes on your Oxygen 8 keyboard.
  6. Practice playing the C-Minor chord over your drum beat. When you are ready, go ahead and record yourself.
  7. Create another melodic instrument and come up with a melody to play over your chord. Record it.
  8. Save this as your name_CMinorchord and turn it in to the Dropoff folder (Pickupdropoff>BAVAC>Dropoff>Period 5).

Have a great weekend!!!

Tuesday, February 17, 2009

2/17_Bars & Beats/G Major chord


Basic Class
OK, before I let you go ahead and work on your beats today, we need to talk about a couple of concepts. First of all, bars and beats...

So, when you are measuring something, (distance, time, weight, etc.) you always need a units of measurement, right? Distance is inches and feet, time is seconds and minutes, etc. In music, we count with beats and bars. This is how you know where you are in your song and it makes it easy to communicate about your music with other artists/producers/etc. So remember this:

Beat - a unit of counting musical time.

Bar - a group of beats (for us, it is almost always 4 beats).

Let's take a look at what this looks like in Reason.

OK, now I'm going to really confuse you. Take a look at the Redrum drum machine and find the section where we program our drum sounds. How many steps do you have here? 16, right?

Even though you see 16 steps here, you should know that this equals one bar.

OK, now that we know how long a bar is, we can start to work with the
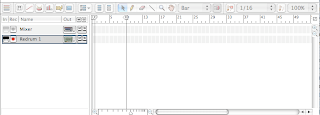
Sequencer Window The goal is for us to get our drums down into this section. To do this, do the following:

  1. Click on the track you want to work with.
  2. Now move the L and R markers for 4 bars. (put the L on Bar 1 and the R on Bar 5).
  3. Click on Pattern 1 in your Redrum drum machine.
  4. Go to Edit>Copy Pattern to Track. You should see this now:
  5. Hit the SPACEBAR to play the track back. Press it again to stop.
  6. OK, now go back to the Redrum and click on Pattern 2. Make a new beat.
  7. In the Sequencer window, move the R marker to Bar 9 and the L marker to Bar 5.
  8. Click on Pattern 2 in the Redrum one more time.
  9. Go to Edit>Copy Pattern to Track. You should see this now:
  10. Click on the Enable Pattern Section button in the Redrum to turn off the Redrum sequencer.
  11. Move the L marker to Bar 1.
  12. Hit SPACEBAR and listen to your whole beat.
  13. To save this, go to File>Save and go into your Home folder (Desktop>Home). Name the file your name_2 Patterns.
  14. Put a drag a copy of this file into our class Dropoff folder (Pickupdropoff>BAVAC>Dropoff>Period 5).

Advanced Class
You folks should continue working on the
G Major chord assignment from Friday. You can look at the blog entry titled 2/13/09 to see it. Try to get started on your own and then I will come around and explain the lesson to you in a few minutes, once I finish giving the Basic class their assignment.

Keep in mind that the first thing you need to do for the assignment is to fill out a
worksheet, which you can get from Corina or Mr. Runde.

Thursday, February 12, 2009

2/13/09


Basic Class
So yesterday we got into using the Redrum drum machine and started making our first beats. Today we're going to learn two new things:
  1. How to make different beats using different patterns in the Redrum.
  2. How to select individual drum sounds and load them into the Redrum.
Assignment:
  1. Open Reason and start a new session (File>New).
  2. Double click on the file to start Reason.
  3. Create a Redrum drum machine.
  4. At the top of the first slot of the Redrum, click on the Folder button.
  5. Click on Reason Factory Soundbank on the left side of the screen.
  6. Click on Redrum Drum Kits in the list.
  7. Now scroll down until you see Xclusive Drums Sorted. Open that folder. What do you see?
  8. Go into the one called Bass Drums.
  9. Single-click on one of the sounds to hear it play. Now go through and check out the different types of bass drums until you find one you want to work with and double-click to load it into the Redrum.
  10. Now go into Slot 2 on the Redrum and click the Folder button.
  11. Do the same thing, but this time load a sound from either the Clap or Snare folders.
  12. Load 2 more sounds into the Redrum, repeating the same process. I recommend loading either a Hi Hat or Shaker, but it's up to you.
  13. Make a beat that you like.
  14. Click on Pattern 2 in the Redrum and make a second beat that is different from the first one.
  15. Save your beat into your Home folder by going to File>Save As. Be sure to add your name into the file name. It should be called: your name_My Drums
  16. Put a copy in our class' Dropoff folder (Pickupdropoff>BAVAC>Dropoff>Period 5).
Advanced Class
So far, we've been working with intervals and learning how to play two notes at a time.
Today, I want you to first finish and turn in your intervals assignment.

After that, you're going to start a new assignment using chords.

A chordis just several notes played at the same time. The most common type of chord has three notes and is called a triad. We're going to start learning how to make triads right now.

When you finish that, please do the following:
  1. Get a worksheet from Mr. Runde and fill it out. This will help you figure out the rest of our assignments for the next few classes.
  2. Create a new Reason session.
  3. Using a Redrum or Dr. Rex, lay down a short (4-8 bar) drum beat.
  4. Create a melodic instrument (NN19/Subtractor/Malstrom/etc.)
  5. Using the G Major scale, find the 1st and 3rd notes of the scale. Play them together. What is this interval called again?
  6. Now, keep your fingers on the 1st and 3rdnotes and add the 5th noteof the scale. Play them all together. Congratulations, you just learned how to play a chord. If you are playing it correctly, this is called a G Major chord.
  7. Now record yourself playing the G Major chord over your drum beat.
  8. Create another melodic instrument and see if you can come up with a melody to go over it. Remember - you automatically know at least 3 notes that will work as a melody. What are they?
  9. When you finish the assignment, try to make it into a full song.
  10. Save it as (your name)_GMajChordand turn it in to the Pickupdropoff folder (Pickupdropoff>BAVAC>Dropoff>Period 5.

Tuesday, February 10, 2009

Intervals - part 2 (minor third)

So yesterday we started working with intervals from the Major scale. Today I want to take a little time going over intervals from the minor scale. First, let's review the formulas for figuring out the scales:

Major Scale
W-W-H-W-W-W-H

Minor Scale
W-H-W-W-H-W-W

So, take a look at your keyboard and take a minute to figure out the notes of the C Major and C Minor scales. Let's pay special attention to the first five keys of each scale. What is the only key that is different between them?

Now, let's play the first and third notes of C Major together. What is this interval called?

Now let's play the first and third notes of C Minor. What do you think this interval is called?

Let's take a minute to listen to a famous beat that uses just two intervals (a 4th and a 3rd) from the F Minor Scale: link.   

So for your assignment, please do one the following:
  1. Keep working on your beat from yesterday and add a new part using a minor 3rd. For example, if you were working on the verse for your song yesterday, work on the chorus today and put a minor 3rd into it. Save it.
  2. If you finish this song and don't feel like adding anything, try to remake the beat for Still D.R.E.  Listen to it again and pay attention to the instruments being used, the tempo etc.

Monday, February 9, 2009

Intervals - part 1

Today we're going to work a little with intervals. 

Intervals are just 2 notes played at the same time. They are great because they allow you to start making more complex sounds. They also allow you to start making chords, which we will be getting into later this week.

The easiest intervals are made by using a scale and then taking the first note of the scale PLUS one other note from the scale.

So, let's start with our old friend, C Major. What are the notes of C Major again?

C - D- E - F - G - A - B - C

What is the first note of the scale?

Right, C. 

So, if I play C and D together, that is called a 2nd.

What do you think it is called if I play C and E?

That's right - C and E makes a third. It's actually a Major third, but don't worry about it just yet. just listen to how it sounds.

OK, now let's play a fourth.

How about a fifth? A sixth? A seventh?

Which ones sounded the best to you?

OK, so your assignment for today is simple:

  1. Pick an instrument you are going to use to play intervals - I suggest a piano, guitar or some kind of poly synth. 
  2. Using the drums that you laid down on Friday and today, start to make a Verse section using at least one intervals. I personally suggest using a third, fourth or fifth, but whatever sounds good to you. 
  3. Try playing different rhythms along with your drums. You can either hold the keys down, or play them quickly - whatever sounds good to you.
  4. Now create another melodic instrument (NN19, Subtractor, NNXT, Malstrom, etc.) to go over the interval and work on a melody to go over it. Remember that you automatically already know at least 2 notes that will work with it (the two that make up the interval!)
  5. Save this to your folder as (your name)_intervals1


Friday, February 6, 2009

Finish Up_2/6/09


Today, please just take the period to finish and turn in the three Reason beats that we have been working on this week:
  1. Buildup Intro
  2. FX Intro
  3. Finding Notes
Once you are finished with these assignments, please start to lay down drums for a song you are going to work on next week.  Try to lay out a song structure (intro/verse/chorus/bridge/etc.)

Thursday, February 5, 2009

Finding Notes (continued)


Today you're going to continue working on finding notes that go along with a Dr. Rex loop of your choice.

  1. Start a new Reason session.
  2. Create a Dr. Rex sample player.
  3. Load a drum loop into it and put it into your song for 4 bars.
  4. Now create a second Dr. Rex and load a melodic loop into it. Put it into your song over the drums (4 bars).
  5. Create a melodic instrument (NN19/Subtractor/NNXT/Malstrom) and load some a melodic sound into it - e.g piano, guitar, synthesizers, etc.
  6. Play your loop back and listen to the melody.
  7. Find at least 2 notes that go along with the melodic loop.
  8. Practice and record a simple melody over the loop.
  9. Now create a second melodic instrument and load a sound that is in a different range than the instrument you recorded before this - so if you picked a high-pitched instrument last time, pick a low pitched one this time, and vice-versa.
  10. Come up with a new melody and record it. Try to make it different from the part you just recorded before - either change the notes, or the rhythm of how you are playing them.
  11. Once you have your 2 original melodies and 2 Dr. Rex Loops, start arranging them into some sort of song structure (Verse/Chorus). At this point, you can add a Redrum if you want to.
  12. Save this as: (your name)_FindNotes and turn it in to Mr. Runde.

Monday, February 2, 2009

Finding notes.

Today, you have 2 goals:

1)  Finish and turn in your two Intro beats.
2)  Do the following assignment:

  1. Start a new Reason session.
  2. Create a Dr. Rex sample player.
  3. Load a drum loop into it and put it into your song for 4 bars.
  4. Now create a second Dr. Rex and load a melodic loop into it. Put it into your song over the drums (4 bars).
  5. Create a melodic instrument (NN19/Subtractor/NNXT/Malstrom) and load some a melodic sound into it - e.g piano, guitar, synthesizers, etc.
  6. Play your loop back and listen to the melody.
  7. Find 2 notes that go along with the melodic loop.
  8. Practice and record a simple melody over the loop.
  9. Save this as:  (your name)_FindNotes